
 KanaxStratz · Aug 28, 2026
  Whiz Kid W EN 15,000 · WO 6,000 · CO 14,000
  Energetic EN EN 4,200
  Always Ready AR EN 13,500 · WO 5,000
 | Skill | 1 | 2 | 3 | 4 | 5 | 6 | 7 | 8 | 9 | 10 | 11 | 12 | 13 | 14 | 15 | 16 | 17 | 18 | 19 | 20 |
|---|---|---|---|---|---|---|---|---|---|---|---|---|---|---|---|---|---|---|---|---|
 Soldier Skills Soldier Skills | 1 | 2 | 3 | 4 | ||||||||||||||||
 Javelin Skills Javelin Skills | 1 | 2 | 3 | 4 | ||||||||||||||||
 HE Rocket HE Rocket | 1 | 2 | 3 | 4 | ||||||||||||||||
 AT Rocket AT Rocket | 1 | 2 | 3 | 4 |
The Javelin Gunner's game, top to bottom. The damage is two rockets paid in energy, the rifle is for what the rockets miss, and from Javelin Skills 2 the class turns 55 energy into an explosive charge you can pick up and keep.
first
Two points in Javelin Skills
Level 1 opens  Disarm and
  Smoke Grenade and widens the HE blast; level 2 opens
  Place Explosive Charge and speeds up the AT missile. The community's recommended order starts with both, so the charge factory runs from level 2.
always
Look behind you before R or T
Every rocket fires a backblast: 490 to 540 damage in a 25 degree cone behind you, full out to 1.8, 15 % out to 3.2. It skips you, psionic units, and anything resistant or invulnerable. Each Javelin Skills level trims it, down to 0.8 and 1.6 at level 4.
The rockets
| Rocket | Damage, level 1 to 4 | Energy | Cooldown | Range | Cast |
|---|---|---|---|---|---|
| AT Rocket T | 3,000 / 4,500 / 6,000 / 7,500 in radius 1.5 | 110 at every level | 55 / 50 / 45 / 40 s | 40 / 50 / 60 / 70 | 1.2 / 1.05 / 0.9 / 0.75 s |
| HE Rocket R | 1,000 / 1,400 / 1,800 / 2,200 in radius 3.5, minus 300 / 400 / 500 / 600 on armored and massive, half on mechanical | 105 / 102 / 99 / 96 | 45 / 40 / 35 / 30 s | 40 / 50 / 60 / 70 | 1.2 / 1.05 / 0.9 / 0.75 s |
Each level of Javelin Skills takes 5 energy and 5 s off both rockets. With Javelin Skills 4 a level 4 AT rocket is 90 energy every 20 s and a level 4 HE rocket 76 energy every 10 s. Neither needs vision of the point: the ability does not ask for target vision, so a rocket into the fog is allowed, and the point is revealed in a circle of 4 for 8 s, half a second after the cast ends, before the rocket lands.
What the script does on a launch
- Wind-up. The moment you order a rocket the script scatters twice, once on a circle of 5 around the aim point and once on a circle of 2 around you. In each circle every biological unit other than you that a computer player owns is ordered to sprint, unless it is already sprinting. The order to move back out of the circle goes to the same units except the ones owned by player 14, and player 14 owns the undead, so the undead sprint but are not pushed out. PMC soldiers belong to a computer player, so they run, which is the "dance" the community's long guide describes: aim, hold the shot, and they move. A Battle Buddy mini belongs to you, not the computer, and stays put. A target marker sits on the point for 1.5 s and your soldier calls "Backblast area clear" in chat. The line is scripted, not a check.
- End of cast. When the cast finishes the scatter runs once more at the aim point and, 0.5 s later, a circle of 4 around it is revealed for 8 s. Neither waits for the rocket to land.
- Your own feet. If the aim point is within 0.2 of you the missile has nowhere to fly, so the script fakes the shot: you are stopped, held uncommandable for the cast time, and the blast lands on you. The delay is read from your AT Rocket level for both rockets. A rocket on yourself hits yourself.
- Javelin Skills 2 swaps the AT missile's mover for a faster one: speed 22 instead of 17.
The long guide's rocket habits
- AT on class 1 and 2 threats, HE on class 3 hordes. Its arithmetic starts from the unit data: a
 Spitter has 800 life, a
  Hunter 1,900, a
 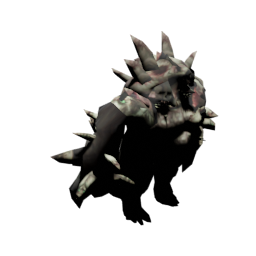 Gargantuan 16,000, a
  Gourmand 18,500, a
 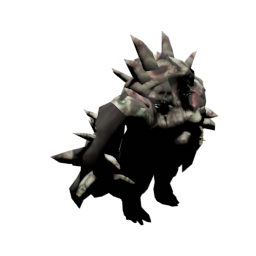 Cacumen 60,000, before the difficulty's multiplier. With Whiz Kid a level 4 AT rocket is 9,750.
 - A missed AT rocket is 110 energy and up to 55 s gone. Aim where the target will be after the cast plus the flight; the cast is 1.2 s at level 1 and 0.75 s at level 4.
- Queue a move with Shift right after the cast: the guide says it removes the after-cast pause and keeps the screen shake from costing you the move. To rocket something on top of you, give a long move order first, pick the circle before you leave it, click once you are out of it.
- Hold an HE rocket for the next horde. On Outbreak the script's horde trigger runs 80 s in and then every 90 s of real time, and the spawn function stops adding non-massive undead once the undead player's supply is past 170. The guide quotes a minute and a cap of 250 to 300 undead; the script's clock is the one above, and its cap is on the undead player's supply, not a head count.
- Kite to gather before you fire: 4 in one AT circle instead of 2 is the same energy.
Charges, claymores, the trap
Making charges
- Place Explosive Charge Q · Javelin Skills 2 · 55 energy · 90 s · from 1.5 range. Sets an Explosive Charge on the ground: 20 life, uncommandable, and it blows for 1,800 to 2,200 in radius 3 and half of that out to 4.5 the moment its 20 life is gone. Area damage that does not skip psionic units sets it off, your own rockets, claymore and trap included. When a player sets it off the blast is dealt by that player's hero; when an undead or PMC does, by the charge itself.
- Disarm Z X · Javelin Skills 1 · 5 energy · 3 s · 1.5 range. On a placed charge: it becomes an Explosive Charge with one charge in it, and the item code stacks charges 24 to a slot. The community's loop is Q, Z, X: one charge every 90 s, for 55 energy, for the whole game.
- Disarm on a placed
 Claymore hands you a Claymore item; Disarm is the item's only source in the item data. Disarm on a
  Combat Engineer's satchel arms it, 10 s fuse.
 - Charges are psionic and the backblast skips psionic units, so a charge behind you survives your own launch. The rockets' blasts do not skip it.
Setting them off
- Claymore E · Javelin Skills 4 · 70 energy · 45 s. A 20-life unit you select and fire: 500 in a 60 degree cone out to 8. The long guide: not worth 70 energy for its own damage, worth it as a remote trigger. A charge in the cone is a target like any other.
 Paralysis Trap W · Javelin Skills 4 · 60 energy · 20 s. Draws the undead that see it, loses 15 life a second, and goes off when killed or when the timer runs out: 80 damage in a radius of 6 and a shove on everything in it, allies and items included. 80 is four times a charge's life, so a trap beside a charge is a trigger that also pulls the undead onto it. The guide's Cacumen trick: trap between you and it; it kills the trap in one hit and the two of you are thrown apart.
- Smoke Grenade D · Javelin Skills 1 · 75 energy · 55 s · range 12. The guide's verdict: the trap does the slowing for 60; keep the smoke for the case where a trap would steal another kiter's aggro.
Energy, Soldier Skills, rank
Energy
- 205 energy. Javelin Skills 3 is the Energy Generator: your regeneration times 1.5, an upgrade on the unit, nothing to press.
- Energetic adds 0.5 a second, a
 Kinetic Integrator 1.25, an
  Energy Cell 190 over 20 s. The two community pages disagree on the integrator: the class page says a Javelin does not need one and should leave it to a
  CombatMedic or a
  Fire Support Specialist; the long guide calls energy cells or the integrator the first item on the list and says to trade charges for one. Both put Whiz Kid first.
Soldier Skills and rank
- The tooltip's level 2 "MOS-specific ability" is Marksmanship: the script adds it on a skill point spent while Soldier Skills reads level 1. It is +2 range, +8 dexterity, a 12.5 % chance of double damage on a shot.
- Enlisted needs 17,000 XP; the script also opens the Enlisted button to anyone with a prestige. Warrant and Commissioned are open from their first rank.
- 2 Javelin Gunners a game, 12 with the Training modifier.
- The rifle is not the damage, so the community picks it for survival: the
 US MCR for the small fast undead (a shot every 0.18 s), the
  MP75R (+0.075 move speed) while you are still learning to outrun a Hunter, and the class page's
  HK42 for its move speed, which the long guide calls useless. The class page pairs the
  M5 MAR with
  40 mm grenades and the
  MGL against Lickers; the long guide says leave the MAR to a medic. All of it is on the Gear tab.
What the community says
Where to stand
- The long guide's opening advice: early on, solo away from the team and hold a spawn area (it names the lake in the middle of the map) so fewer undead reach the team and nobody is behind you. Never in Thalim without a reason.
- The long guide puts every teamkill on the Javelin. Stand at the squad's edge with a cliff or a wall behind, be the kiter when the squad moves, check positions before a long shot.
- PMC: the rockets are crowd control there. The scatter above is the script's order, and the guide adds that PMC attack claymores and try to set off charges, so plan on the rockets, and says the class is useful again against PMC class 1.
Skill order
- The order in this guide is the class page's T1 Bane, its recommended build: Javelin Skills 2 first, so charges start at level 2, then AT Rocket 1 and HE Rocket 1, Javelin Skills to 4, AT Rocket to 4 by level 9, Soldier Skills 1 and 2, HE Rocket to 4, Soldier Skills 3 and 4. Its argument: one level of HE with Whiz Kid is 1,300, enough for a class 3 mass, and the AT levels do the rest.
- The page's other build, Mass Cleaner, for Outbreak: HE Rocket 1 first, then Javelin Skills to 4, Soldier Skills 1 and 2, AT Rocket 1, HE Rocket to 4, Soldier Skills 3 and 4, AT Rocket to 4.
- The long guide's own order: HE 1, Javelin 1, then AT and Javelin until AT 4 and Javelin 3, Javelin 4 at level 9 for the trap, then HE if energy is fine and Soldier Skills if survival is not. Under the Tier 1 modifier it says to skip HE 1 until level 8.
- Its pace in Hard or Insane Outbreak: level 4 at the end of the prologue, 8 at the CLP escort, 10 at the end of chapter 1, 13 at the end of chapter 2.
SIs
- Whiz Kid first, on both pages. Its behaviour is +30 % on spell damage dealt, which is the kind the rockets and the charge deal; the guide's 7,500 × 1.3 = 9,750 is that.
- Second: Energetic on the class page and in Outbreak; Always Ready when there is no modifier and levels come slowly, or when you want charges from the first minute;
 Power User when somebody else carries and cells are shared.
 - Situational, per the long guide:
 Self-Sufficient with one point of Soldier Skills when no quik clot turned up;
  Heavy Armor against PMC grenades;
  Light Armor or
  Twinkle Toes to outrun Nightmare's class 1.
  Veteran and
  Reactive Fire are called useless here: the rifle is not the damage.
Items
- Vision:
 Ground Flares and
  Flare Guns. With 70 range and no vision requirement the rocket goes where you cannot see, and the guide's kiting plans rest on knowing where a spawn is before it reaches anyone.
  Kevlar Body Armor, the class page's pick: armor with no move speed lost.
- Consumables (
 quik clot,
  First Aid Kit, the MGL, grenades) for emergencies only;
  Aim Assist and body armor go first to whoever shoots for a living.
Numbers are read from the map file: its ability, effect, upgrade and unit data and its trigger script. The advice is the community's, from the two wiki pages on the class, and is marked as such.