
 KanaxStratz · Aug 28, 2026
  Commissioned Officer
  Energetic EN EN 4,200
 The Platoon Leader's game, top to bottom. One per game, on the Commissioned Officer track only, and most of what the class does lands on other players: an aura, linked vision, a dropship that moves them across the map, a ping when one of them is dying.
first
Leadership Skills
The first point flips a switch for the whole game: every fireteam on the map is linked from then on, for every player, and the game announces who did it. The linked vision only works for you if you have joined a fireteam yourself. What levels 2 to 4 add is below, under Leading and Redeploy.
then
Officer Equipment
The shared Binoculars of level 2 is a script trigger: each time your  Binoculars completes, the map creates the same reveal again for every ally at the point you looked at. The tools it opens are in the table below.
on the way
Pick up the AA-12
The  AA-12 is a ground drop only you can use: +25 damage, 10 % faster, a 50-round magazine instead of 35, and
  Burst Fire goes to 4 times your fire rate instead of 3.
always
Read the SITREP pings
When any hero is hit at a quarter of its life or less, the map pings that unit for you in red for 7 s, with the player's name on the ping, and writes "is in danger" after the name on your screen. Nobody else gets it. One ping per player every 20 s.
Leading
The fireteams, linked
- The fireteam window is everyone's: up to 4 teams of 4. Members of a team see a 2 radius circle around each other, refreshed every 0.3 s.
- Leadership 1 links them. Every member of any team now sees around every member of every team, and the game is told who switched it on; the window's label reads [ Linked ].
- Only you see farther: a 3 radius around each member at Leadership 1, then 4, 5 and 6 at Leadership 4. Everyone else keeps 2.
- The vision is drawn for players who are in a team. Join one, and tell the others to.
Retreat and Concentration
- {{ability:Retreat}} · Leadership 2. The button puts the Retreat buff on you and radios "Move, move, move !" under your name to every player.
- {{ability:Concentration}} · Leadership 4. Same shape, with "Fire at will !" on everyone's radio.
Redeploy
What it does
- Leadership 3 puts a Redeploy button on every player's screen, not only yours. The map's own text on it: it redeploys only that player, and can be used once per game.
- The player clicks it alive, with a living Platoon Leader on the map, and picks where: to the Platoon Leader, to Thalim, to the Airport, to the PMC hill, to the West Relay, to the East Relay. Cancel hands the single use back.
- A
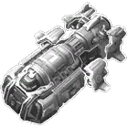 Phantom lifts off from the TCP farthest from that player, flies to every biological unit the player owns (the hero and any minis), takes them one at a time, then flies to the target and sets them down within 2 of it. Sprint is stripped at pickup; in flight they are hidden and cannot be hit.
 - The pickup runs on a 90 s clock for the whole group. Whoever is not aboard when it runs out stays behind.
- "To the Platoon Leader" means where you stood when the button was clicked, not where you are when the Phantom lands.
The five fixed destinations are the points and regions the redeploy triggers send the Phantom to; the sixth is wherever the Platoon Leader stands. The City Guard area is where the emergency shield drone launches from.
The officer's tools
| Tool | Comes with | What the script adds to the tooltip |
|---|---|---|
| Binoculars | Officer Equipment 1 | Range 46 in the map's ability data. The ally-side reveal from Officer Equipment 2 is a second copy of the same effect, created for each ally at your target point. |
 Laser Designator Laser Designator | Officer Equipment 3 | The designated unit's vision is shared with every player, its name is written in purple on everyone's screen, a purple ping sits on it for 4 s, and two text tags over its head stay until the effect ends. Officer Equipment 4 adds the second charge and the improved designator upgrade. |
 Call For Fire PL Call For Fire PL | Officer Equipment 4 | Below. |
| Burst Fire | the start | 10 energy, 5 s cooldown in the map's data. 3 times your fire rate for 2 s; 4 times with the AA-12; 2.5 s once you have  Soldier Skills 2. Soldier Skills 2. |
 Send an emergency Drone Send an emergency Drone | the Assault Engineer's purchase | 20 energy, 120 s cooldown, no range limit. It exists once an  Assault Engineer has bought the Emergency Shield Drone add-on for 25 scraps at the Assault Engineer has bought the Emergency Shield Drone add-on for 25 scraps at the  City Guard; you get a tip on screen when that happens. The City Guard; you get a tip on screen when that happens. The  drone spawns at the City Guard, flies to your target, shields it and dies. If the City Guard is dead or Broken, nothing is sent. drone spawns at the City Guard, flies to your target, shields it and dies. If the City Guard is dead or Broken, nothing is sent. |
The tooltip says Burst Fire is +100 % for 1 s; the map's behaviour data says 3 times (4 with the AA-12) for 2 s.
Call For Fire
As the script runs it
- A shared pool of shells. 175 at the start, 50 more when Chapter 2 opens, 25 more each time a
 Fire Support Specialist levels his Call for Fire. Each of those FSS levels also raises the Call for Fire damage upgrade for every player, 600 more a shell, so your shells hit harder with an FSS in the game. You, the
  CavalryScout and the FSS all draw from the pool. A shell that would land off the map goes back in.
 - One fire mission at a time. A call made while another is in the air waits its turn, then starts its own delay.
- Once your call is the active fire mission, the red ping goes out to allies, 9 s later the incoming sound plays and everyone gets vision of a 5 radius around the point for 8 s, and 1 s after that the first shell is fired (the tooltip counts 10.5 s to impact). The IDF levels that shorten it are the FSS's and only work for his own calls.
- As the first shell is fired the map orders computer-run biological units in a 5 radius (minis, LNs) to sprint and move out. Players get no such order.
- Not in Infested. The map switches CallForFirePL off on the Platoon Leader when the class is picked in that mode. Not during Plague Vectors either: no fire missions for anyone until that mission ends, won or lost.
The settings
- Typed in chat, per player, and kept until you change them: -s shells, 1 to 10 (default 1); -r radius, 2 to 10 (default 2); -i interval between shells, 0.2 to 5 s (default 0.2), and the game jitters each interval by up to 0.1 s either way; -d an angle in degrees, a cardinal letter (n, e, s, w and the diagonals) in place of the angle, or c for circular (default circular). A value outside the range is refused with a message.
- Circular: each shell lands at random inside the radius. An angle: the shells walk in that direction, one radius apart, and the marker grows arrows showing it.
- -cff or a bare -s prints your current settings.
- The marker on the ground is the allies' warning. The arrows on it only appear when a direction is set, one per shell after the first.
The shotgun
| AA-11 | with the AA-12 | |
|---|---|---|
| Damage | 136 to 160 a shot | +25 |
| Range | 18, +1 at Officer Equipment 4 | same |
| Period | 1.3 s | 10 % faster |
| Spread | units within 3, in a 15 degree arc, take 60 % | same |
| Magazine | 35 rounds, 4 s reload | 50 rounds |
| Burst Fire | 3 times the fire rate | 4 times |
The AA-12 is on the map's second item spawn list and only the Platoon Leader can use it. It stays a shotgun: the reload is the default 4 s and jams are on.
What the community recommends
SI and items, per the wiki
- The community's page puts Energetic as the SI: the class has 205 energy and, per the wiki, every tool above costs some of it.
- Its item list: an
 Energy Cell for the moments you need several tools at once, an
  MGL with
  40 mm grenades against priority targets such as Lickers, and
  Kevlar Body Armor for survivability. The wiki's reason for the Kevlar is survivability without loss of move speed, but in the data it carries no move speed mod at all, where
  OPA gives 0.05 move speed on top of its shields.
 - It says you do NOT need a
 Kinetic Integrator, the NOT in capitals, and less so than a
  CombatMedic or a Fire Support Specialist does.
 - Its weapon line is one item: the AA-12.
Calling fire, per the wiki
- Ask the Fire Support Specialist before you call: the shells are his too, his land faster, his Call for Fire levels are what raise the damage of every shell, yours included, and he needs them for his other fire abilities. A call queued behind yours can be delayed by up to 10 s and miss.
- Without one, the page's uses for the Platoon Leader are holding a spot you saw the wave heading for, and killing a
 Morbus from range with 2 or 3 shells.
 - Its settings advice: stay circular; raise the interval to 2 or 3 s so shells keep landing as a pack crosses the point, 5 s for slow packs. Keep -i .2, -r 2 and -d c until you are used to it.
- It rates the ability better in Survival than in PMC, where the PMC leave the marked circle.
Numbers are read from the map file: its ability, behaviour, item and weapon data and its trigger script. The advice is the wiki's Platoon Leader and Call For Fire pages.