
 KanaxStratz · Aug 28, 2026
 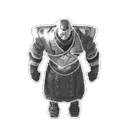 Commissioned Officer
 The APC's game, top to bottom. One class carries people. 1,000 life, 250 energy back at 1.8 a second, 6 item slots, a hold that heals whoever rides in it, and a 60-round gun that cannot jam. Officer track only, 150,000 XP and 5 medals, one per game.
first
Pick a turret
Class panel: F1 Gauss Turret from the start, F2 Flame Cannon at  Equipment 2, F3 Missile Turret at Equipment 3. A swap shuts the weapons for about 1 second and the keys do nothing until it is done. All three fire from the same 60-round drum.
then
Fill the hold
 Take Aboard (C) on civilians, police, your own minis, or another player's hero, who answers with F8. Whoever is inside is invisible, invulnerable and healed 10 life a second; a soldier gets 3 more per
  Boarding level. Civilians ride until you put them down; the wiki's Civilians page puts their destination at Thalim. Soldiers ride to heal.
then
Park and deploy
 Deploy (W) roots the hull. Every friendly unit within 16 of it gains 0.5 weapon range and a little speed per Deploy level, and a flying eye over the hull is shared with every player.
  Reinforcements (R) and the Nanobots only work deployed; the two bots need Deploy 4 and CAS on station, deployed or not.
always
Empty it before it counts
Unload all Civilians (X) puts the civilians out around the hull; -unload in chat puts everyone out, soldiers included. The script does it for you when the APC dies or drives into the evacuation LZ, so nobody is lost with the hull.
Boarding
Who fits
- Civilians and police:
 civilians,
  police officers, beach-goers. 6 seats per Boarding level, 24 at Boarding 4. A civilian standing inside Thalim is refused; one in the Guslani trees is refused until the Guslani mission is running.
 - The Mayor rides only while his mission is on; otherwise he refuses over the radio (this is not the time, he says). Farmer Akma would rather walk and the Scientist is claustrophobic: both decline on the radio.
- Soldiers: 1 seat at Boarding 1, a second at Boarding 3. Your own units board at once. Another player's hero or mini gets a dialog on his screen and 5 seconds to press F8; let it pass and nothing happens. A soldier owned by the friendly AI army cannot be picked up at all: the trigger answers with "You are not authorised to take aboard this soldier."
- Type -aboard in chat to see both counts against their maximums.
Getting out
- A soldier aboard is uncommandable and untargetable, and every second the script drags him back onto the hull and cancels his orders. He leaves through the Go out button on his own screen, not through yours.
- The healing is 10 life a second for everyone inside. The +3 per Boarding level is an upgrade on the soldier seat only, capped at 3 levels by the map's upgrade data (19 a second at most); civilians stay at 10.
- Unload all Civilians is free and instant. -unload clears the soldiers too and hands them back selected.
- The script unloads everyone when the APC dies, enters the evacuation LZ or leaves the AO. A Mayor put out walks to the middle of Thalim on his own.
The Take Aboard trigger tests these regions before it loads a civilian; the Mayor is sent to the city region when he is put out.
Deploy
Deployed
- Rooted in place; the toggle carries a 10 s cooldown. The aura reaches 16 around the hull and goes to every non-enemy unit in it: +0.5 range and +0.023 speed at Deploy 1, up to +2 range and +0.1 speed at Deploy 4.
- Half a second after you deploy a flying dummy with 15 sight is created over the hull and its vision is shared with every player; it is removed when you undeploy.
 Binoculars (Q) needs the Deploy skill only, so it fires undeployed as well. From Deploy 3, and only while the APC is deployed, the reveal is cast for every allied player too.
- Nanobots (
 Chassis 4, deployed only): every second, biological units within 16 get +1 life a second, and a vehicle that stays under them 10 seconds straight has every ailment cleared, structural damage, engine, sensors, shielding, weaponry and power leaks alike. Leave earlier and nothing is cleared.
Reinforcements
- Reinforcements · R · deployed, Deploy 2 and up. 150 energy, 120 s at Deploy 2, 140 and 110 s at Deploy 3, 130 and 100 s at Deploy 4.
- Deploy 2: a
 medic and 2 riflemen. Deploy 3: a combat engineer joins. Deploy 4: a medic, an engineer, a rifleman and a
  flamethrower; the tooltip says an AR, the script spawns a flamethrower.
 - They last 60 seconds, then fade and are removed.
- Every 3.5 s the ones you are not selecting are walked back to within 3.5 of the hull if they strayed past 5, and each one close by has a 1 in 4 chance of being sent to attack around it. Select them if you want them to hold a line.
The two bots (Deploy 4, CAS on station)
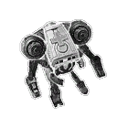 Medical Bot (C in the additional actions) and
  Wmk-72 RTo (V) need Deploy 4 and CAS on station. The script switches that on at Chapter 2 in the regular modes (once the Mayor escort is over), at PMC's own Chapter 2, at Act 2 of Invasion, and at the 30-minute mark of Survival; the third DNH mission takes it away and gives it back once the air threat is down. Each costs 150 energy, and the two share one 20-minute cooldown: one bot per 20 minutes, not one of each. The button puts an item in your inventory, or on the ground beside you if all 6 slots are full; anyone can carry it and anyone can use it.
| Bot | Revives | How it picks | Then |
|---|---|---|---|
| Medical Bot | a dead soldier hero within 12 of where the item is used | a dead  CombatMedic or CombatMedic or  Phoenix Medic first, otherwise the nearest, and it picks the moment the item is used, so a hero who dies during the start-up is not seen Phoenix Medic first, otherwise the nearest, and it picks the moment the item is used, so a hero who dies during the start-up is not seen | 8 s on the spot, then walks over, works about 8 s more, revives, blows itself up |
| Wmk-72 RTo 3 | a dead vehicle within 12:  walker, walker,  helicopter, helicopter,  Rjx-73, Rjx-73,  tank, or the APC itself tank, or the APC itself | the nearest, and it picks only after the 7 s of start-up, so a vehicle that dies during that wait is still picked up | 7 s on the spot, then walks over, works about 8 s, revives, blows itself up |
If nothing dead is in range the bot drops the item back where it stood, so the item is not lost, only the walk. A revived APC comes back at 400 life and 50 energy.
The turrets
| Key | Turret | Needs | Range | Rate | Each shot |
|---|---|---|---|---|---|
| F1 | Gauss Turret | nothing | 17 | one every 0.3 s | 39 damage, and 30 % of it to what stands within 4 behind the target in a narrow cone; the cone's filter does not exempt allies. ×0.8 on armored and mechanical, ×0.6 on heroic. |
| F2 | Flame Cannon | Equipment 2 | 9 | one every 0.5 s | 24 damage to everything along a line 12 long from the muzzle: +20 on light and biological, -5 on armored, -10 on massive. Allies are skipped. |
| F3 | Missile Turret | Equipment 3 | 21, 2 minimum | one every 6 s | a rocket: 120 damage in radius 2, 20 % of it out to 3.5, +6 on light, -35 on heroic, and a 1.2 s stun in radius 2. Allies are skipped. Costs 5 energy on top of the round. |
Every turret spends 1 round a shot from the same 60-round drum, reloaded in 4 s; the APC is on the map's no-jam list. You start the game with the drum full and 9 spare magazines, and the gauss empties a drum in about 18 seconds of steady fire. Equipment 4 is an upgrade, not a turret: +2 range on the gauss (19) and the missiles (23), and +10 gauss damage (49). Its +2 flame damage is written on a damage effect the cannon's line search does not fire, so do not count on it. When the APC dies the death trigger strips all three turrets and a revive puts none back: press F1 (or F2, F3) once you are rebuilt or you drive around unarmed.
The APC can be told to hold its fire, from the HUD button or with Ctrl+G. That is what keeps the gauss cone off your own people.
Mortar Round (Boarding 2)
 Call For Fire (G) is a single shell of the Platoon Leader's Call for Fire: 90 energy, 15 s cooldown, 38 range, no vision needed. It does not spend from the shared shell pool that
  Platoon Leader,
  CavalryScout and
  Fire Support Specialist draw on. A warning marker appears at the point, 2 seconds pass, the incoming call sounds, 1 more second, and only then is the shell fired: 3 seconds from the order plus the flight. Computer-owned people within 5 of the point, civilians and the AI's soldiers, are told to run before it hits; your own minis and the other players are not. The same call orders Sprint on the computer-owned biologicals in the radius, the undead among them, so the warning hurries along what you are shelling. 1,000 damage at the point (give or take 100), 60 % out to 2, 40 % out to 4, less 100 on mechanical and 250 on heroic. Boarding 4 makes it 2,000, takes 3 s off the cooldown and 30 off the energy: 60 energy, 12 s. Explosives hurt allies, and
  Whiz Kid raises them 30 %. The Take Aboard tooltip's 40 range and 1,600 damage are not what the ability data says.
The rest of the kit
| Ability | Key | Needs | Costs | Cooldown | What it does |
|---|---|---|---|---|---|
 All Terrains Mode All Terrains Mode | A | Chassis 1 | 90, then 2 a second | 20 s | A toggle: the hull walks over cliffs (its mover becomes the Colossus one) at 0.75 of its speed. Energy comes back at 1.8 a second, so the drain is 0.2 net. |
 Defensive Matrix Defensive Matrix | D | Chassis 3 | 40 | 60 s | A shield on the hull. The absorb amount is not in the extracted data; the community's page puts it at 100. |
 Smoke Grenade Smoke Grenade | X | Equipment 1 | 55 | 45 s | 30 range. A 30 s cloud: everything in it, allies included, moves at half speed, loses 4 weapon range and sees no farther than 13; it wears off 0.6 s after leaving. |
 Flare Grenade Flare Grenade | F | Equipment 1 | 60 | 45 s | 30 range. 45 s of vision for all players, detects the cloaked within 15, slows enemies within 6 by 20 %; the enemy sees by it too. |
| Binoculars | Q | Deploy 1 | 9 | 18 s, 15 s from Deploy 2 | 46 range, 8 s of sight, detects. |
| Deploy | W | Deploy 1 | 10 s | The toggle above. | |
| Take Aboard | C | Boarding 1 | 8 / 6 / 4 / 2 | 2 to 3 range. | |
| Unload all Civilians | X | In the additional actions. Free, instant. |
Costs and cooldowns are the map's ability data; the keys are its hotkey file.
Chassis, by the numbers
- Chassis 1: 3 armor, 40 life, +0.1 speed, and All Terrains Mode.
- Chassis 2: 6 armor, 80 life, +0.2 speed, and 3 life a second: that is the Self Diagnosis System in the data; the passive's own button carries no numbers.
- Chassis 3: 9 armor, 120 life, +0.3 speed, and Defensive Matrix.
- Chassis 4: 12 armor, 160 life, +0.4 speed, and the Nanobots.
Ailments and repairs
- The APC rolls vehicle ailments like the other vehicles: a hit of 5 or more with the shield already down can knock out a system.
- Above 95 % life the script clears the structural damage at once and, 40 s later if nothing interrupts the repair, the rest of them.
 Nanites w13z: 100 life and the severe ailments gone at once, vehicles only. The Nanobots do it in 10 s while you are deployed.
- An engineer's
 Repair (CE) works on the hull, and an
  Assault Engineer's Craft upgrades the
  Scope or
  vehicle recoil suppressor you have equipped, in place.
 - Dead, the APC is a wreck that an engineer's
 Reconstruct or the Wmk-72 brings back, not a medic. Everyone aboard is put out when the hull dies.
What the community recommends
SIs the wiki points at
 Quick Thinking · the APC cannot jam, but the 4 s reload of the 60-round drum gets 30 % shorter.
 Hawk Eye · +2 weapon range on whichever turret is mounted; the community's page says the flame cannon feels it most (9 to 11) and the missile turret barely.
- Whiz Kid · +30 % explosive damage: the mortar round and, by the wiki, the missile turret.
- The wiki lists
 Intellectual and
  Barbaric as having no use on the APC.
 - The wiki's ability build is marked WIP, so there is no skill order here.
Items
- The vehicle set the wiki recommends, all on the Gear tab:
 Aim Assist (vehicle) (+20 % damage, attack speed ×1.15), Recoil Suppressor (vehicle) (+1 range, 10 % slow, 15 % once crafted),
  Shield Generator (vehicle) (+5 armor, 200 shields) or
  Minor Shield Generator (vehicle) (100 shields),
  Weight Reduction (vehicle) (+0.04 speed; the wiki carries two),
  Recon Drone Module (detection, +1 sight, +1 range), Scope (+2 range, +1 sight, crafts to
  Improved Scope).
 - Energy:
 Power Cell and
  Energy Cell Packed both work, 190 energy over 20 s.
 - The wiki's list of items the APC can use also holds
 Ammo Case and
  Magazines, both allowed for every class.
 - The wiki's Flare Gun is not on the APC's item list; the APC's flare is the Flare Grenade ability above.
Numbers are read from the map file: its unit, ability, weapon, behaviour and upgrade data and its trigger script. The SI and item advice is the community's page on the wiki, kept where the data agrees with it.